Are you looking for help to get started with 3D printing? At Imprimy, we are here with our various tutorials to guide you step by step through your discovery and the development of your skills in this field, thanks to our 3D printing tutorials.
You can find online tutorials on 3D printing that cover the basics, 3D modeling, 3D printer settings, and tips for achieving successful prints.

What are our 3D printing tutorials specially designed for beginners?
Discover our various tutorials specifically designed for those looking to get started with 3D printing.
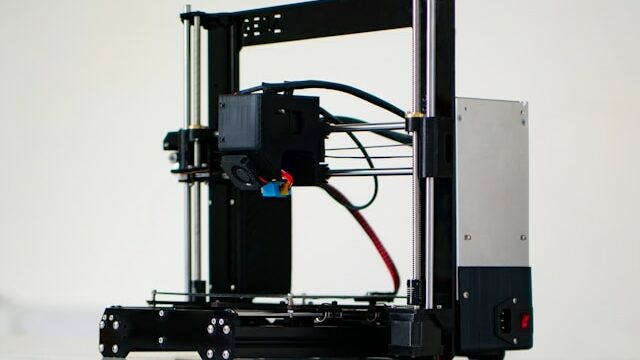
Choosing Your First 3D Printer
Having to choose your first 3D printer may seem intimidating, but by focusing on a few key criteria, it becomes much easier. You should start by determining your budget, as prices vary significantly depending on the models you’re interested in.
Next, identify your specific needs between:
- an FDM printer (Fused Deposition Modeling), which is ideal for large prints and a variety of materials,
- an SLA printer (Stereolithography), which offers finer details and better surface quality but comes with some limitations.
Also consider the ease of use, the community support you might find, and features such as build plate size, precision, and connectivity options. By conducting thorough research and reading user reviews of the different 3D printers you’re considering, you’ll be able to make an informed decision before purchasing your first 3D printer.
Taking Your First Steps with a 3D Printer
Once you’ve purchased your first 3D printer, starting to create 3D objects may seem a bit overwhelming. You’ll need to begin by assembling and setting up your machine, which can be more or less difficult depending on the model you’ve bought.
Carefully follow the manufacturer’s instructions for assembly, then proceed with the calibration of your printer—especially adjusting the build plate to ensure you have a level printing surface.
Once that’s done, download a simple 3D model from one of the many available platforms, or create one using modeling software. Then, import this file into your slicing software to prepare it for printing by adjusting basic settings such as the nozzle temperature, bed temperature, print speed, and infill.
All that’s left is to start the print and monitor the process to identify and fix any potential issues—for example, poor bed adhesion or layer shifting. With a bit of patience and practice, you’ll quickly master the basics of 3D printing and be ready to take on more complex projects.
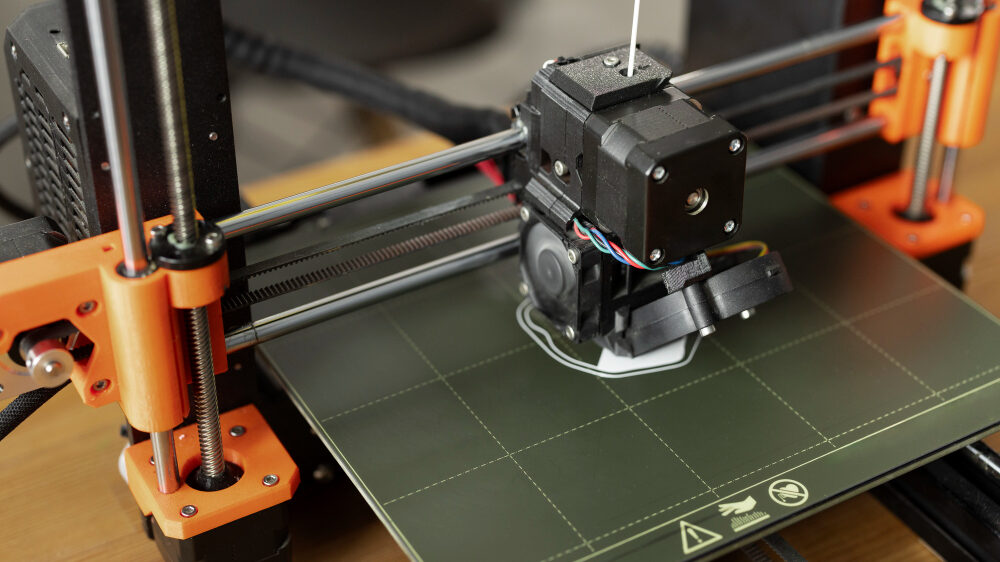
Preparing and Successfully Launching Your First 3D Prints
To properly prepare and start your first 3D prints, you should begin by choosing a simple 3D model and downloading it from a platform. Import this file into a slicing software, which will convert the model into instructions your 3D printer can understand.
Next, adjust the basic settings such as the nozzle temperature, bed temperature, print speed, and the infill percentage of your model. Make sure the print bed of your 3D printer is properly leveled to ensure optimal first layer adhesion.
Use adhesive tape or a suitable print surface to improve adhesion. Once the settings are done, transfer the generated G-code file to your printer via an SD card, USB connection, or over the internet.
All that remains is to start your 3D print and closely monitor the first layers to detect any adhesion issues or under-extrusion problems that may occur.
What are our intermediate-level tutorials?
Discover our various tutorials specifically designed for individuals looking to refine their knowledge in the field of 3D printing.
All About 3D Modeling
3D modeling opens up a whole new world of creative possibilities, allowing you to design your own objects to print. Start by choosing software suited to your level, such as Tinkercad for beginners or Fusion 360 and Blender for more complex projects. Get familiar with the interface and the basic tools of these programs, such as primitive shapes (cubes, cylinders, spheres), which you can combine and modify to create more sophisticated models.
Don’t hesitate to learn essential techniques such as extrusion, sweep, and revolve to add depth and detail to your creations. Many online tutorials and videos can also guide you step by step in your exploration of 3D modeling.
Finally, don’t forget to practice regularly to improve your modeling skills, and feel free to explore community resources for tips and inspiration. You’ll quickly be able to design personalized, functional, or artistic parts, ready to be 3D printed.
Optimizing Your 3D Prints Effectively
To properly optimize your 3D prints, you need to master several key settings in your slicing software. It starts with adjusting the layer height: a smaller height provides better resolution but increases print time, while a larger height speeds up the 3D printing process at the cost of lower resolution.
Set the infill density based on your object’s intended use: 10–20% infill is sufficient for decorative objects, while functional parts require a higher percentage for strength. Make sure bed adhesion is optimal by using skirts or rafts if necessary. Also adjust the print speed and nozzle temperature depending on the type of filament you’re using to avoid issues such as warping or under-extrusion.
Finally, use supports for overhanging parts of your model and make sure to configure them properly to allow for easy removal after printing.
Perfecting the Post-Processing of Your 3D Prints
Post-processing your 3D prints is a crucial step to improve the appearance and functionality of the objects you’ve created. Start by carefully removing supports generated during printing, using pliers or a modeling knife to avoid damaging the final piece.
Next, sand the surfaces with fine-grit sandpaper to remove visible layer lines and achieve a smooth finish. For ABS prints, you can use acetone smoothing by briefly exposing the object to acetone vapors for a glossy, even finish. For resin prints, additional curing under a UV lamp is often required.
If you plan to paint your model, first apply a primer coat to ensure good paint adhesion. Use acrylic paints for a durable finish, and add details with fine brushes.
Finally, protect your work with a clear varnish. By following all these post-processing steps, you can significantly enhance the appearance and durability of your 3D prints.
What are our advanced tutorials?
Discover all our advanced tutorials specifically designed for those who want to take the plunge into 3D printing at a higher level.
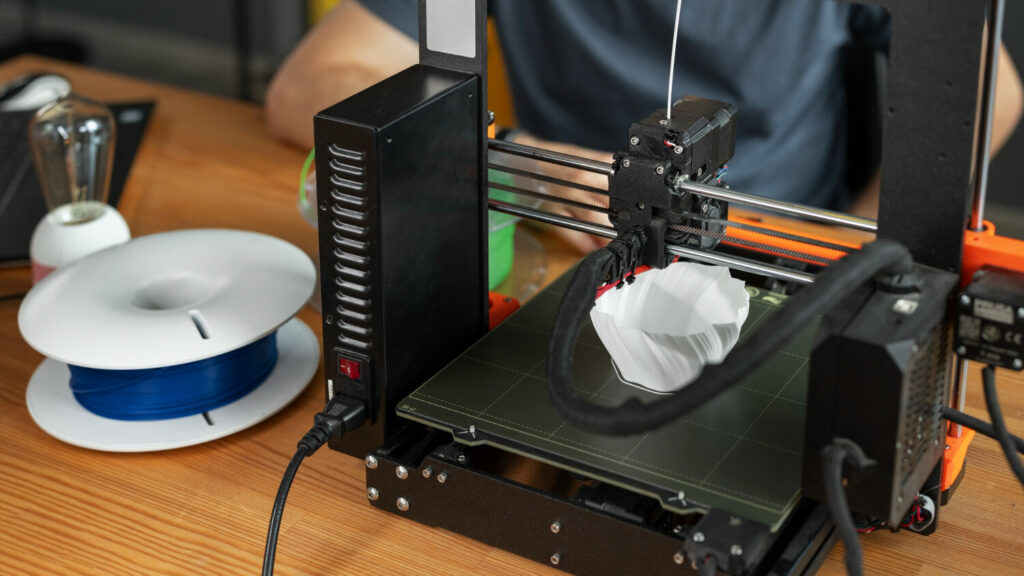
Creating Multi-Material and Multi-Color 3D Prints
Creating Multi-Material and Multi-Color 3D Prints
Creating multi-material and multi-color 3D prints allows you to make complex and aesthetically diverse objects. To do this, you need a 3D printer equipped with multiple print heads or one capable of automatically switching filaments.
Start by preparing your model using a 3D modeling software that supports multiple materials and colors, assigning the appropriate colors to different parts of the model. In your slicing software, configure the specific settings for each material, such as nozzle temperature, print speed, and retraction parameters to avoid unwanted mixing.
During printing, closely monitor the transition between materials and colors to ensure good adhesion and precise alignment. Proper management of filament purges is also crucial to prevent contamination between colors or materials.
Managing Maintenance and Repair of Your 3D Printer
Properly managing maintenance and repair of your 3D printer is essential to ensure high-quality prints and extend the lifespan of your machine. Start regular maintenance by cleaning the extruder to prevent clogs, and make sure the print bed is clean and always level. Regularly check the belts and screws to ensure they are tight and in good condition. Lubricate the motion axes for smooth operation.
If issues arise, such as layer shifting or extrusion errors, identify the source by inspecting parts like the nozzle, motor, or endstop sensors. Replace worn or damaged parts following the manufacturer’s instructions and using compatible components. Also, keep your printer’s firmware up to date to benefit from the latest improvements and bug fixes.
Creating Functional Parts with 3D Printing
3D printing also allows you to create functional parts. This requires paying close attention to the design, material choice, and the printing settings associated with your machine. Start by designing your part using CAD software (computer-aided design) to ensure precise dimensions and a structure suited to its functional use.
Select appropriate materials, such as PETG for rigid parts, TPU for flexible parts, or even reinforced composites if you need increased strength. In the slicing software, configure parameters like a high infill percentage for better strength, an adequate layer thickness, and optimized temperature and speed settings for the chosen material. Also, ensure sufficient bed adhesion to prevent warping.
Once your part is printed, perform post-processing if necessary, such as sanding or curing, to improve the durability and finish of the piece.
Are There Inspiring Projects Associated with 3D Printing?
Get started with 3D printing by helping your community, making useful objects, or focusing on educating young people.
Carrying Out Community and Collaborative Projects
You can undertake community and collaborative projects in 3D printing, allowing you to share knowledge and innovate collectively with other 3D printer users. Start by joining dedicated online platforms or specialized forums, where you can find open projects and collaborate with other 3D printing enthusiasts.
Participate in hackathons or design challenges to stimulate creativity and solve real-world problems. Contribute by sharing your own 3D models, improving others’ designs, or offering technical advice.
Use online project management tools to coordinate efforts, distribute tasks, and track progress. Connected 3D printers and shared file libraries also enable rapid testing and iteration on 3D object designs.
Create Do It Yourself projects
Engaging in Do It Yourself (DIY) projects with 3D printing offers a wide range of creative and practical opportunities. Start by identifying a project that matches your interests or needs, whether it’s creating custom household gadgets, office accessories, replacement parts for everyday items, or even decorative elements.
You can find free or paid 3D models on platforms suited to your skill level and 3D printer. Customize the models according to your preferences by adjusting dimensions or adding extra features.
During printing, carefully monitor bed adhesion and watch out for misplaced supports. After printing, perform post-processing to improve the appearance or functionality of the object, such as sanding, painting, or assembling the various components.
Carrying Out Educational Projects
3D printing is also an engaging way to introduce students to modern technology while encouraging their creativity and hands-on learning. You can select educational projects suited to the age and interests of your children or students. These might include anatomical models for biology, historical architecture models, or simulations of scientific phenomena for physics.
Using easy-to-use 3D modeling software, allow students to design their own models or modify existing designs. Teach them the basics of 3D design and modeling, as well as printing parameters such as infill and supports.
During printing, involve students in the process by encouraging them to observe and document the various stages. After printing, discuss the challenges encountered and the solutions found to deepen their understanding of technical concepts.
Conclusion: Why follow our 3D printing tutorials?
By following our 3D printing tutorials, you will be able to master this innovative and revolutionary technology. Our detailed guides will guide you step by step, from choosing your first 3D printer to completing advanced and functional projects. By following our advice, you will learn not only to avoid common pitfalls in 3D printing but also to optimize your printing settings for high-quality results.
Whether you are a beginner looking to explore this technology or an experienced user aiming to perfect your skills, our tutorials will provide you with the knowledge and skills necessary to succeed in all your 3D printing projects. Join our community and discover how 3D printing can transform your ideas into tangible reality.
Picture by Osman Talha Dikyar sur Unsplash
The articles published on Imprimy.com are for informational purposes only. They are intended to provide general advice and information related to 3D printing. Imprimy.com cannot be held responsible for the results obtained or the consequences arising from the application of the shared information. We recommend always checking the specific instructions for your hardware and materials before use.
Check our other contents about 3D printing tutorials :
The history of 3D printing
Would you like to know more about the history of 3D printing to discover how…
Rapid 3D Printing
Are you wondering about rapid 3D printing and its production capacity? At Imprimy, we are…
The layer height in 3D printing
Would you like to discover everything you need to know about layer height in 3D…