Do you have any questions about 3D printing slicers? Imprimy is here to explain everything to you.
What is a 3D Printing Slicer and How Does It Work?
A slicer is a software that slices a 3D model layer by layer to convert it into instructions, which will then be transformed into a physical object.
- What is a 3D Printing Slicer and How Does It Work?
- Different Types of 3D Printing Slicers Available
- How to Use a 3D Printing Slicer
- Essential Slicer Settings for 3D Printing
- What are the tips for optimizing settings in your slicer?
- What are the common issues that can be encountered with slicers?
- Conclusion: Slicer for 3D Printing
The main role of the slicer for 3D printing
The main role of the slicer for 3D printing is to convert a 3D model into printable instructions by slicing it into thin layers and generating G-code, which tells the 3D printer how to build the object layer by layer. It also allows users to configure various printing parameters such as layer height, print speed, infill density, and support structures, ensuring the print is optimized for the specific printer and material being used.
Cutting Process in 3D Printing
The cutting process in 3D printing refers to the method by which a 3D model is divided into thin horizontal layers that the printer can then process layer by layer to create a physical object. This process is carried out by the slicer software, and it involves several key steps:
- Importing the 3D Model: The first step is to import a 3D model (usually in STL or OBJ format) into the slicer software.
- Defining Print Settings: The user configures various print settings within the slicer, such as layer height, infill density, print speed, and whether support structures are needed.
- Slicing the Model: The slicer software divides the model into thin, horizontal slices, usually starting from the bottom of the object and working upwards. Each slice represents a single layer of the final printed object.
- Path Generation: The slicer calculates the path the print head should take for each layer. It generates the movement instructions for the printer, determining how to extrude material and where to deposit it for each layer.
- Creating the G-code: The slicer converts these instructions into G-code, a standard file format used by 3D printers. The G-code contains precise commands that guide the 3D printer on how to move, extrude, and build each layer of the object.
- Saving the G-code File: The final output is a G-code file that is transferred to the 3D printer, which uses it to begin the printing process.
This cutting process is crucial because it ensures that the 3D printer can efficiently and accurately create the object layer by layer, following the specific settings and adjustments made by the user.
Settings to Define in 3D Printing Slicer
When using a 3D printing slicer, several key parameters need to be defined to optimize the print quality, speed, and material usage. Below are the most important settings to configure:
- Layer Height:
- This parameter controls the thickness of each printed layer.
- Smaller layer heights (e.g., 0.1 mm) result in finer detail but increase print time.
- Larger layer heights (e.g., 0.3 mm) print faster but with less detail.
- Infill Density:
- Infill defines the internal structure of the printed object.
- A higher infill density (e.g., 50%) makes the object stronger and heavier, while a lower density (e.g., 10%) saves material and printing time but results in a less sturdy object.
- Print Speed:
- This determines how fast the print head moves and extrudes the material.
- Faster speeds can reduce print time but may affect quality, especially for fine details.
- Slower speeds generally improve print quality but take longer to complete.
- Temperature:
- The print temperature for both the hotend (extruder) and heated bed (if available).
- Each filament type (PLA, ABS, PETG, etc.) has a recommended temperature range for optimal adhesion and extrusion.
- Support Structures:
- Support is used for printing overhangs or complex geometries that cannot be printed without support.
- The slicer allows you to choose the type of support (e.g., grid, tree-like, or organic) and the density of supports.
- Shells/Wall Thickness:
- This setting defines the thickness of the outer walls (or shells) of the print.
- Thicker walls increase strength but use more material.
- First Layer Settings:
- Adjustments for the first layer are critical for good bed adhesion.
- Parameters such as first layer height, first layer speed, and temperature are often set differently to ensure a successful start to the print.
- Retraction Settings:
- Retraction controls the movement of filament inside the extruder when the nozzle moves across gaps.
- Proper retraction settings help prevent stringing and oozing.
- Cooling:
- Cooling fan settings influence the cooling speed of the material as it is extruded.
- Cooling is essential for some materials like PLA, which can warp or deform without adequate cooling.
- Z-Hop:
- This feature causes the print head to lift slightly when moving over non-print areas, reducing the risk of scraping the printed object and improving quality.
- Brim or Raft:
- A brim is an additional layer printed around the base of the object to help with adhesion to the bed.
- A raft is a more complex support structure that provides a base for the print but uses more material.
Each of these settings can be adjusted to suit the specific requirements of your print, helping to optimize results for the type of material, the design of the object, and the capabilities of the printer.
Different Types of 3D Printing Slicers Available
Open-Source Software vs Proprietary Software for 3D Printing
Slicing software, essential for 3D printing, is divided into two main categories: open-source software and proprietary software.
Open-source software offers great flexibility and is often free, allowing users to customize settings and contribute to improvements through an active community. On the other hand, proprietary software is developed by companies that keep the source code closed and often offer specific features or advanced optimization in exchange for a paid license. The choice between these two types depends on the user’s needs, technical skills, and budget.
Criteria for Choosing a 3D Printing Slicer
When selecting a slicer for 3D printing, several factors must be considered to ensure that the software meets your specific needs. Below are the key criteria to help guide the decision:
- Compatibility with Your 3D Printer : Ensure the slicer supports your specific 3D printer model. Some slicers are compatible with a wide range of printers, while others are tailored for specific brands or models.
- Ease of Use : A user-friendly interface is essential, especially for beginners. Look for a slicer that is intuitive and easy to navigate, with clear instructions and helpful features.
- Customization and Advanced Settings : If you are an experienced user, you may want a slicer with advanced customization options, such as adjustable layer heights, print speeds, temperature controls, and support structures.
- Support for Multiple File Formats : Ensure the slicer can handle various 3D file formats like STL, OBJ, and AMF, which are commonly used in 3D printing.
- Material Compatibility : Make sure the slicer supports a broad range of materials, such as PLA, ABS, PETG, and TPU. This is essential if you plan to work with different filament types.
- Speed and Efficiency : Consider how quickly the slicer can process files, particularly for larger models or complex designs. Look for a slicer that offers efficient performance without compromising quality.
- Support Generation : The slicer should be able to generate effective support structures for overhangs and intricate geometries, ensuring smooth prints.
- Community Support and Resources : Open-source slicers often benefit from a strong community of users who can provide tips, troubleshooting advice, and custom profiles. This is a valuable resource for beginners and experts alike.
- Software Cost : Consider the cost of the slicer, particularly when comparing open-source (free) software with proprietary (paid) options. While free slicers can be highly functional, paid ones may offer advanced features and premium support.
- Updates and Development : Look for a slicer that is regularly updated with new features, optimizations, and bug fixes. This ensures you are using the latest technology and improvements.
- Cloud-Based or Desktop Software : Decide whether you prefer a cloud-based slicer for access from any device or a desktop-based slicer for more control and customization.
- Preview and Visualization : A slicer with a preview function allows you to see how the layers will be printed before starting the actual print, helping you identify any potential issues.
- Price and Licensing : Review the pricing structure of the slicer, especially if it is proprietary. Some slicers require a one-time purchase, while others may have a subscription model.
By carefully considering these factors, you can choose the slicer that best fits your 3D printing needs, whether you are a beginner or an advanced user.
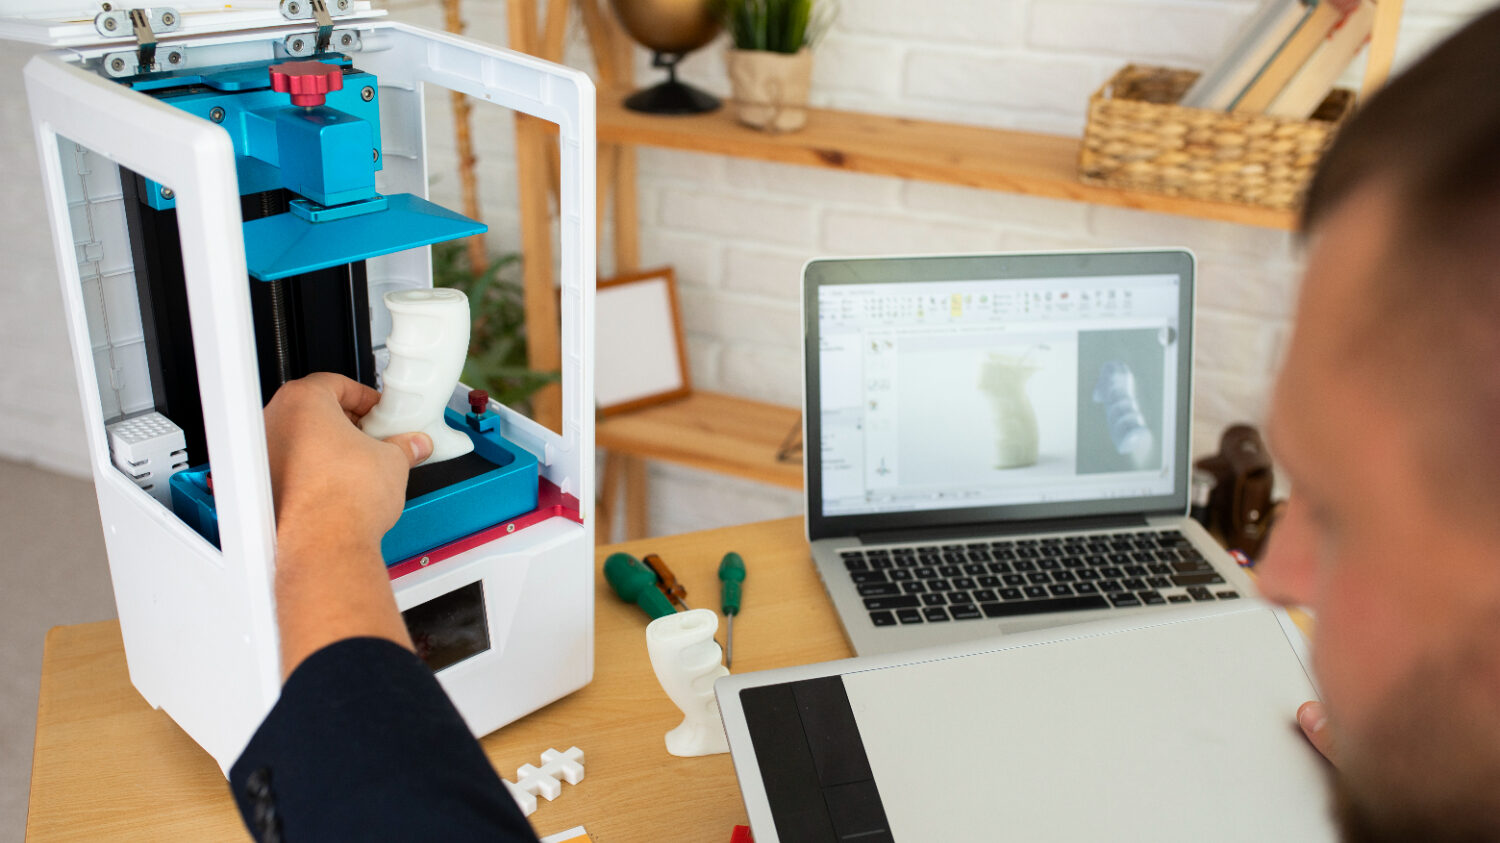
How to Use a 3D Printing Slicer
To use a slicer, you need to import a 3D model and adjust certain settings. You can then preview the printer’s path and generate the commands in the form of G-code, which will be sent to the 3D printer.
Importing the 3D Model
To begin using a slicer, the first step is to import your 3D model into the software. Here’s how you can do it:
- Open the Slicer Software: Launch the slicer program of your choice (e.g., Cura, PrusaSlicer, or Simplify3D).
- Import the 3D Model: Click the “Import” or “Open” button in the slicer interface. This will prompt you to select a 3D file (usually in STL, OBJ, or AMF format) from your computer.
- Position the Model: Once imported, the model will be displayed in the slicer’s workspace. You may need to rotate, scale, or move the model to fit the print bed.
- Check for Errors: It’s a good practice to inspect the model for any issues, like holes or inverted faces, that could cause printing problems. Some slicers have built-in tools to fix minor errors automatically.
By completing these steps, your 3D model is now ready to be sliced and prepared for printing.
Adjusting the Printing Settings
Once you’ve imported your 3D model into the slicer, you need to configure the print settings to ensure optimal results. Here are the key parameters you should adjust:
- Layer Height:
- This determines the resolution of your print. A smaller layer height (e.g., 0.1 mm) results in finer details but takes longer to print. Larger layer heights (e.g., 0.3 mm) will print faster but with less detail.
- Print Speed:
- This controls how fast the printer moves during printing. Slower speeds often lead to higher quality prints but take more time. Common speeds range from 40 to 100 mm/s, depending on the material and printer.
- Infill Density:
- Infill density determines how solid the printed object will be inside. Higher infill density (e.g., 50%) makes the print more solid and durable, while lower infill density (e.g., 10%) saves material and reduces print time.
- Infill Pattern:
- This defines the internal structure of the print. Common patterns include grid, honeycomb, or lines, each offering different strengths and material usage.
- Supports:
- For models with overhangs or complex geometry, you may need to enable support structures. These are temporary structures printed to hold parts of the model during the process and can be removed afterward.
- Choose between support style (e.g., tree or grid supports) based on your needs.
- Wall Thickness:
- This determines how thick the outer shell of the object is. A thicker wall (e.g., 2-3 mm) improves strength and durability but uses more material.
- Temperature Settings:
- Set the print temperature for the hotend (extruder) and the heated bed (if applicable). These settings vary depending on the filament material (e.g., PLA, ABS, PETG).
- Hotend Temperature: Typically between 190°C and 220°C for most filaments.
- Bed Temperature: For PLA, around 50°C to 60°C; for ABS, about 100°C.
- Set the print temperature for the hotend (extruder) and the heated bed (if applicable). These settings vary depending on the filament material (e.g., PLA, ABS, PETG).
- Retraction Settings:
- Retraction helps avoid stringing or oozing of filament by pulling it back into the nozzle when the printer moves without printing. You’ll need to adjust retraction distance and speed for clean prints.
- Adhesion Method:
- Depending on your printer and model, you may need to enable a method of adhesion like a raft (a base layer) or brim (a wider edge around the print) to help with print bed adhesion.
- Printer Profile:
- Select your printer from a predefined list, or manually input specific printer parameters, such as build volume, nozzle diameter, and material compatibility.
These settings can be customized depending on the material used and the specific printer requirements. After adjusting these parameters, you’re ready to slice the model and generate the G-code for the 3D printer.
Previewing the Print Path
After adjusting the print settings, the next important step is to preview the print path. This allows you to visualize how the 3D printer will lay down the material layer by layer, helping you to identify potential issues before starting the actual print. Here’s how to do it:
- Generate the G-code:
- Once you’ve set all the print parameters, click the Slice button (or equivalent) in your slicer software. This will convert the 3D model and settings into G-code, a language that tells the 3D printer how to move, extrude, and build the object.
- Enable Preview Mode:
- After slicing the model, select the Preview or G-code Preview option in your slicer software. This will show a simulation of the printer’s movements layer by layer.
- Visualize Layer by Layer:
- In preview mode, you can view the print path in layers. The slicer software will display each layer’s pattern, infill, and support structure. You can often scroll through the layers to see how the model will be built up.
- Check for Potential Issues:
- Look for any areas that might cause problems during printing, such as:
- Overhangs: Ensure that overhangs have adequate support or that the print speed is adjusted to avoid drooping.
- Thin Walls: Verify that the walls are thick enough for your desired strength and durability.
- Infill Gaps: Ensure that the infill is solid enough and that there are no gaps that could weaken the object.
- Look for any areas that might cause problems during printing, such as:
- Inspect the Supports:
- If you’ve enabled supports, preview how they will be placed. Make sure they provide proper support without being excessive. You can also sometimes modify or remove supports in the preview mode if necessary.
- Check for Print Speed:
- In the preview, you can often see the movement speed of the print head. If certain areas are printed too quickly or slowly, you might want to adjust the print speed settings.
- Adjustments if Needed:
- If the preview reveals any issues, return to the settings and make adjustments. For example, you might change infill density, print speed, or support structure to address any concerns.
By previewing the print path, you can catch potential problems before the print begins, saving time and materials and ensuring a smoother printing process.
Generating the G-code
Once you’ve finalized the 3D model, adjusted the print settings, and previewed the print path, the next step is to generate the G-code. G-code is a set of instructions that tells the 3D printer exactly how to print the object layer by layer. Here’s how the process works:
- Slicing the Model:
- After adjusting the settings, click on the Slice button (or its equivalent) in the slicer software. This process will convert the 3D model into a series of instructions, taking into account the layer height, infill, supports, temperature, and other print parameters you’ve set.
- Choosing Output Format:
- The slicer will then generate the G-code, which is typically saved as a file with the extension .gcode. You can usually choose the file destination to save it to your computer or directly to an SD card or USB drive that you will later insert into the 3D printer.
- Customize G-code Settings (Optional):
- Some slicers allow you to adjust specific G-code commands, such as adding custom scripts for calibration or temperature adjustments. However, for most standard prints, the default settings are sufficient.
- File Transfer:
- Once the G-code file is generated, transfer it to your 3D printer. This can be done via:
- SD card/USB stick: For printers that do not have direct connectivity to a computer.
- Direct connection: For printers connected via USB or Wi-Fi to a computer running the slicing software.
- Once the G-code file is generated, transfer it to your 3D printer. This can be done via:
- Check the G-code File:
- Before starting the print, it’s a good idea to double-check the generated G-code file for any inconsistencies or errors. Some slicers provide a built-in G-code viewer that simulates the movement of the print head.
Once the G-code is transferred to your 3D printer, you’re ready to start the printing process. The printer will follow the instructions contained within the G-code file to print the object layer by layer, as you have configured.
Sending the G-code to the 3D Printer
Once you’ve generated the G-code file, the next step is to send it to your 3D printer. Here’s how to do it:
- Transfer the G-code:
- SD Card/USB Stick: If your 3D printer uses an SD card or USB stick for file transfers, insert the SD card or USB stick containing the G-code file into the appropriate slot on your 3D printer. Make sure the file is located in the correct directory, typically the root or “Print” folder.
- Direct Connection: If your 3D printer is connected to your computer via USB or Wi-Fi, you can send the G-code file directly from the slicing software to the printer. Ensure that the 3D printer is powered on and properly connected to the computer.
- Select the G-code on the Printer:
- If using an SD card or USB stick, navigate through the 3D printer’s menu to locate the G-code file. You can usually find it under an option like Print or Select File. Once located, select the file to start the printing process.
- If using direct connection, ensure that the slicing software is properly set up to control the printer. The software should provide an option to start the print once the G-code is transferred.
- Start the Print:
- After selecting the G-code file, initiate the print. The 3D printer will begin to read the instructions in the G-code file and start printing your model layer by layer.
- Monitor the Print:
- It’s a good practice to monitor the initial layers of the print to ensure the printer is functioning correctly. Check for any issues like poor adhesion or misalignment at the start.
By following these steps, your 3D printer will begin executing the instructions provided by the G-code, leading to the creation of your physical object.
Essential Slicer Settings for 3D Printing
The essential settings of slicers include layer height, print speed, support generation, selecting the correct temperature, and infill density.
Managing Layer Height
Managing Layer Height is a key parameter in 3D printing, as it directly affects the quality, strength, and printing time. A fine layer height, typically between 0.1 mm and 0.2 mm, offers better resolution and more precise details, making it ideal for decorative or complex objects.
On the other hand, thicker layers, around 0.3 mm or more, allow for faster printing and are better suited for functional parts where fine detail is less critical. This setting should be adapted to the nozzle size (for example, a 0.4 mm nozzle works well with 0.2 mm layers) and the material used, to ensure a balance between quality and performance.
Defining Print Speed
Print Speed in 3D printing determines how quickly the nozzle moves to deposit the filament, influencing both the quality and duration of the print. It is typically expressed in millimeters per second (mm/s) and can vary depending on the needs and the type of filament used.
A slower speed, around 30 to 50 mm/s, is recommended for fine details or for challenging materials like TPU or ABS. In contrast, a higher speed, up to 100 mm/s or more, is suitable for fast prints but may result in reduced accuracy. It is essential to find a balance, taking into account the printer’s capabilities, the desired quality, and the filament’s behavior to avoid defects such as oozing or under-extrusion.
Generating Supports
Generating Supports is an essential feature in 3D printing, allowing for the creation of temporary structures to support parts of the model that overhang or are suspended in the air during printing. Supports are particularly useful for printing objects with overhangs, bridges, or complex shapes.
Slicers offer various support generation options, including tree-like supports or regular lines, and allow you to adjust density, support angle, and the type of material used (e.g., the same filament as the model or a soluble material like PVA). These supports are then removed after printing, either manually or by dissolution if a soluble material is used. Fine management of supports helps reduce material consumption, print time, and post-processing difficulty.
Choosing the Right Print Temperature
Choosing the Right Print Temperature is crucial for achieving optimal results in 3D printing. The extrusion temperature, or nozzle temperature, varies depending on the material used. For common plastics like PLA, an extrusion temperature between 190°C and 220°C is generally recommended, while for materials like ABS, the temperature should be set between 230°C and 250°C.
The bed temperature is also important as it helps ensure good adhesion of the first layer. For PLA, a heated bed at 50°C to 60°C is sufficient, while for ABS, it should be heated to 90°C or higher. Poor temperature selection can lead to issues like under-extrusion, warping, or poor adhesion. It is essential to check the filament manufacturer’s recommendations and adjust the temperature based on the specifics of the printer and printing conditions.
Indicating the Correct Type and Fill Density
The Type and Fill Density are crucial parameters that determine the strength, weight, and print duration of a 3D object. The type of fill depends on the application and geometry of the object: common patterns include lines (linear), grids, honeycomb structures, or more complex patterns like triangles or gyroids. Honeycomb structures offer a good balance between strength and lightness, while linear or grid patterns are faster to print but may be less durable.
The fill density, expressed as a percentage, determines the internal density of the object. A low fill rate, around 10% to 20%, is sufficient for decorative or lightweight objects, while a higher fill rate, between 40% and 100%, is necessary for functional parts requiring increased strength. A higher fill rate increases the print time and filament consumption but improves the mechanical strength of the object. It is therefore important to choose the right type and density according to the specific needs of the print, balancing quality, performance, and material cost.
What are the tips for optimizing settings in your slicer?
You can improve your slicer by optimizing the print speed, removing unnecessary supports, controlling common defects, or performing test prints.
Optimizing print speed without sacrificing quality
Optimizing print speed without sacrificing quality involves several strategies, such as:
- Adjusting Layer Height: Use thicker layers for faster prints without compromising the quality of the object.
- Increasing the Printing Temperature: Slightly raising the extrusion temperature can improve flow and reduce print time.
- Optimizing Infill Density: Reduce the infill percentage to speed up the printing process, particularly for non-structural objects.
- Adjusting Shell Thickness: Use fewer outer layers for speed, as long as the object’s strength is not compromised.
- Fine-tuning Print Path: Use more efficient path strategies like zigzag or honeycomb patterns, which reduce time while maintaining quality.
Balancing these factors allows you to increase speed without significant quality loss.
To remove unnecessary supports
To remove unnecessary supports, consider the following steps:
- Identify Overhangs and Bridges: Review your 3D model to ensure supports are only placed in areas that truly need them, such as overhangs or bridges where the filament cannot naturally support itself.
- Use Support Density Control: Reduce the support density for non-critical areas or use less aggressive support structures to save time and material.
- Selective Support Placement: Some slicers allow you to manually or automatically place supports only in certain regions, rather than all over the model.
- Use Adaptive Supports: Use slicers that feature adaptive support options that generate supports only where needed, ensuring no excess material is used.
- Experiment with Support Types: Consider using alternative support structures like tree supports, which use less material and are easier to remove.
Removing unnecessary supports saves material, reduces print time, and simplifies post-processing.
To control common defects in 3D printing
To control common defects in 3D printing, you can take the following actions:
- Check for Overheating: Monitor the temperature of the nozzle and the print bed to avoid warping, stringing, or oozing. Ensure the printer is calibrated for the appropriate material temperature.
- Fix Under-Extrusion: If the layers are not adhering well or gaps appear between lines, adjust the extrusion settings, clean the nozzle, or check the filament for any blockages.
- Adjust Speed and Layer Height: Ensure you’re using the correct print speed and layer height settings for the material and the print quality desired. Too high a speed or too thick a layer can result in defects.
- Level the Bed: A misleveled bed can cause adhesion issues and uneven layers. Regularly calibrate the bed to ensure optimal print quality.
- Control Cooling: Inadequate cooling can lead to poor layer adhesion or stringing. Ensure the cooling fan is working well, especially for finer prints.
- Monitor for Warping: Warping occurs when the printed object cools unevenly. Ensure good bed adhesion and use a heated bed if needed, or consider using a raft or brim.
By carefully adjusting these settings, you can minimize defects and achieve high-quality prints.
Conducting Test Prints
Test prints are a great way to fine-tune your slicer settings and ensure your 3D printer is functioning properly. Here’s how to approach it:
- Choose a Simple Model: Start with a simple test model, such as a calibration cube, a temperature tower, or a benchy. These models allow you to observe various potential issues like overhangs, layer bonding, and fine details.
- Print at Different Settings: Test different layer heights, infill densities, print speeds, and temperatures to see how they affect the final print. This will help you identify the optimal settings for your material and printer.
- Check for Common Issues: After printing, inspect the test print for common issues such as under-extrusion, stringing, warping, or layer misalignment. Use these observations to adjust your settings accordingly.
- Refine the Settings: If the test print shows problems, tweak your slicer settings and run another test print. This iterative process allows you to improve the quality of your prints over time.
- Use Calibration Tools: Many 3D printers have built-in calibration tools or the community offers specialized models to calibrate things like the extruder or bed leveling. Use these to optimize your printer’s performance.
By regularly conducting test prints, you can ensure your printer is running smoothly and produce higher-quality prints.
What are the common issues that can be encountered with slicers?
The issues associated with slicers can be related to G-code errors, incompatibility with certain 3D models, or insufficient optimization of supports.
A G-code generation error
A G-code generation error can occur for various reasons and cause issues during 3D printing. The most common errors include incorrect commands, misconfigured settings, or corrupted files. For example, if the slicer uses the wrong printer profile or incompatible settings with the 3D model (such as an incorrect nozzle size or inappropriate temperature), the generated G-code may not execute correctly on the printer, leading to printing errors like under-extrusion, missing layers, or erratic movements of the print head. To resolve this error, it’s important to check the slicer settings, ensure the model is properly prepared (e.g., by repairing it using a specific tool), or select the correct printer and material profile. If the issue persists, resetting the slicer or testing another software to generate a new G-code might help. Finally, some printers have error logs or reports that can help pinpoint the exact source of the problem.
Incompatibility with certain 3D models
Incompatibility with certain 3D models can occur when the slicer is unable to process a model correctly, leading to issues during printing. Common causes include non-manifold meshes (where the model has holes or disconnected faces), inverted normals or overly complex geometries that the slicer cannot handle efficiently. These issues can result in incorrect G-code generation, poor print quality, or even complete failure of the print.
To resolve these problems, it’s important to check the model for errors using 3D repair tools such as Meshmixer or Netfabb. Simplifying the geometry or breaking the model into smaller parts can also help. Ensuring the model is properly scaled and oriented before slicing can prevent compatibility issues. If problems persist, using different slicer software or updating the slicer may be necessary to support the model better.
Insufficient support optimization
Insufficient support optimization can lead to printing issues such as poor overhangs, excessive use of material, or difficult post-processing. When supports are not properly generated, areas that need support might either be unsupported, leading to sagging or collapse during printing, or have excessive material, which increases printing time, material waste, and difficulty in removal.
To optimize supports, ensure that the slicer is set to automatically place supports in the right locations while avoiding excessive material use. Choose the right support structure type, such as tree supports for delicate or complex models. Adjust support density, angle, and pattern to match the complexity of the object and minimize waste. Additionally, make sure the support contact points are minimized or use soluble support materials for easier removal. Testing different support settings or experimenting with manual support placement can also help achieve better results.
Conclusion: Slicer for 3D Printing
In conclusion, slicers are vital software tools in the 3D printing process, transforming 3D models into instructions that printers can understand. They allow users to control key aspects of the print, including layer height, speed, support structures, temperature settings, and infill density. The choice between open-source and proprietary slicers depends on factors such as customization needs, technical expertise, and budget. While slicers are incredibly powerful, users must understand how to optimize their settings to achieve high-quality results, avoid common errors, and improve printing efficiency. Mastery of slicer software is essential for maximizing the potential of 3D printing technology.
Picture by Freepik.
The articles published on Imprimy.com are for informational purposes only. They are intended to provide general advice and information related to 3D printing. Imprimy.com cannot be held responsible for the results obtained or the consequences arising from the application of the shared information. We recommend always checking the specific instructions for your hardware and materials before use.